When configuring vRA service broker custom forms, it is often useful to validate user values prior to the data being sent for processing by vRA / vRO or ABX actions.
In order to achieve this, vRO custom validations can be used in conjunction with custom forms.
In this example I have a free text field which allows users to enter an array of IP addresses, where each address is separated by a comma. The goal of my validation is to check the list is valid, and the IP addresses are 4 octets, 3 digits max etc.
Step 1 – Create vRO Action
Within vRO, a dedicated action will be needed for the validation.
When building any validation action, remeber that if the test you are performing against the data is successful, a blank string should be returned to the interface, else the return should provide relevant information to the user so the input data can be fixed.
@@INPUTS: ipRange :: Type: string

if (!ipRange) {
	return("")
} else {
  var ipPattern = '^(25[0-5]|2[0-4][0-9]|[01]?[0-9][0-9]?)\.(25[0-5]|2[0-4][0-9]|[01]?[0-9][0-9]?)\.(25[0-5]|2[0-4][0-9]|[01]?[0-9][0-9]?)\.(25[0-5]|2[0-4][0-9]|[01]?[0-9][0-9]?)$'
  var ipArray = ipRange.split(",")
  for each (ip in ipArray) {
      var isValidIp = (ip.match(ipPattern) != null);
      if (isValidIp == 0) {
          return("Invalid IP Address " + ip + " Found")
      }
  }
  return("")
}
Step 2 – Add validation to a custom vRA form
Within vRA 8.x Service Broker, Edit your custom form and choose the validations tab.
Drag a custom validation into the center of the screen.

Click on the ‘External Validation’ box in the centre. Options will now pop up on the right hand side.
Search for the action which was created in step 1. Then, choose the field which will provide the input data into your action. Finally, for highlighted fields, choose a field which will highlight an error if the data fails validation and an error is to be returned to the interface.

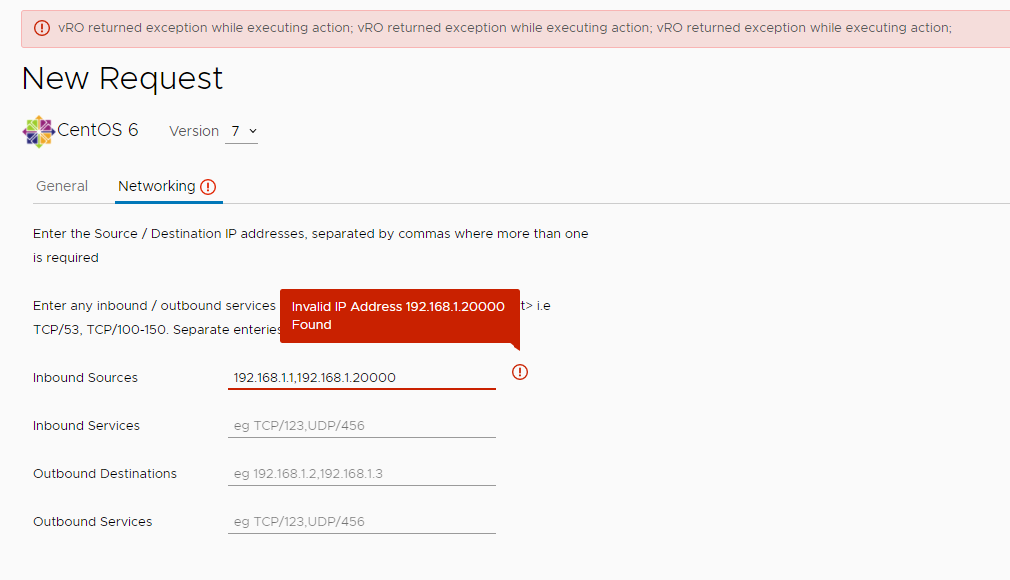
Step 3 – Test it works!
Back to the custom form designer, the validation has been bound to the ‘Inbound Sources’ field, which is a simple text box.

Once data is now input into this field and submit is pressed, the vRO action is executed in the background and if the action fails to return a blank string, the chosen ‘highlighted field’ is marked, and the return text is presented.
In the examples below, malformed IP addresses are input and the problem values are returned to the user, thus blocking the ability to submit the new deployment.


Multiple validations can be added to custom forms to enhance consistency across deployments. This can be as simple as an IP format check (as shown above), or a complex API call to a third party system.
I hope this helps. Enjoy!